Next: Sharing documents and notes
Getting Started
This guide explains the basic process of getting a document into the A.nnotate system and adding comments.
Adding a document
Log in at a.nnotate.com. The top menu shows the main areas of your account. The home page shows the most recent activity, including annotations in your documents by other users. The second item, documents, is the starting point for adding new documents.
In the middle at the top of the documents page there is an upload button. The button opens the upload dialog.
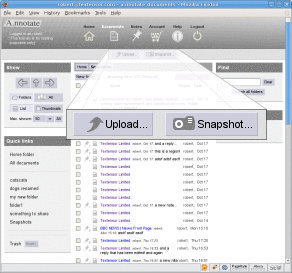
The buttons at the top of the documents page let you upload
new documents and take snapshots of web pages.
|
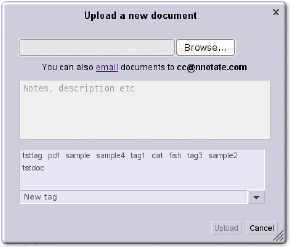
The upload button opens a dialog for selecting the file to
upload. You can add a description and tags at this stage or leave
them blank to be edited later.
|
Click "Browse" to select the file. The other elements are optional: you can add some notes about the file to help remember what it is. The area below contains a list of recently used tags. You can associate these with the file just by clicking them, or you can create a new tag by typing it in the line below.
Finally, clicking "Upload" transfers the file to A.nnotate.com. The annotatable version should appear a few seconds after the transfer is complete.
You can also add a document by sending it as an email attachment to cc@nnotate.com . A.nnotate uses the address you sent it from to work out who you are so if you have multiple email accounts you should send it from the email address you use with A.nnotate. When the file arrives A.nnotate will send a message back to you with a link to open up the annotatable version.
Adding comments and tags to text in the document
To add a comment to a particular word or phrase, select the words with the mouse by clicking and dragging. Unlike text editors, you click on a word to select it, not in the space just before it.
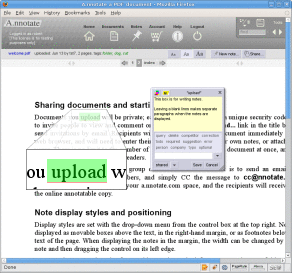
To annotate a word or phrase, first select the text with the mouse.
The notebox opens to write the note.
|
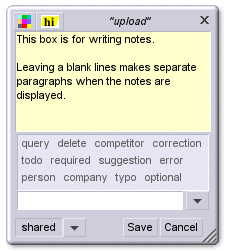
The notebox lets you write a note, select tags, and
choose the color and style for an annotation. When you click
save the note is added to the page.
|
You can only select whole words or sequences of words, not single letters. Clicking anywhere on a word will select it. After selecting some text, a box appears to add a comment or tags. Simply type your comments in the yellow area and click "Save" to put them on the document.
Adding comments and tags to images or areas of the page
If you click and drag on the text, A.nnotate will start a text annotation. If you click anywhere else on the page it starts an image annotation. You can drag out a box with the mouse, move it around the page, and adjust the size. As you move the mouse, the edges that will be affected when you click are show in green.
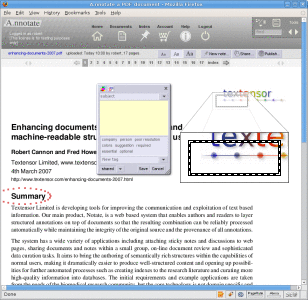
To annotate part of an image, click with the mouse and drag out a
rectangle. The notebox opens to write the note.
|
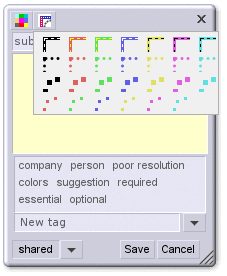
The notebox for regions
lets you specify the border color and style used to mark the region
with dropdown menu at the top left.
|
The menu at the top of the notebox lets you choose the style for the border of the region from solid and dotted rectangles, and dotted ellipses. After the region has been selected adding text and tags is the same as for text annotations.
Tags, colors and annotation styles
The area below the text entry box is for tags. These can be used on their own (without writing a note) or in conjunction with a note. You can select from existing ones by clicking on them or add new ones where it says "New tag". If you type a new one it will try to auto-complete from all the tags you have used before as shown below. You can also click the down arrow to the right and select "more..." to get a scrollable list of tags.
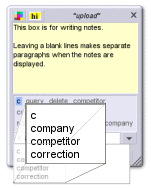
Tags can be added by clicking on recently used ones, entering
new ones in the space provided, or using the autocomplete function.
|
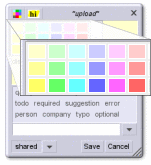
The top left menu lets you select a background color for the note.
|
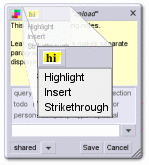
For text annotations there are three possible styles: highlight,
strikethrough and insertion.
|
If you add tags but no note and click "Save" a small bubble will be attached to the text in the page showing the tags. For notes, a little box is shown with the note above the target text. You can hide notes by clicking the 'x' in the top right of the note. Click on the highlighted text to show the note again.
Editing and replying to notes
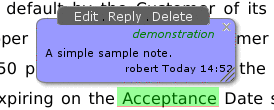
Clicking on a note activates controls at the top where you can edit it, add a reply, or delete it. Clicking "Edit" brings up the note editor as before. If you share a document with other people, and someone adds a reply to a note, then the edit option is no longer available (you can't change the text that they have already responded to) but you can always add a reply to your own notes.
Document navigation
The top and bottom of each document page has a navigation bar that lets you jump to other pages or go through the document page by page with the left and right arrows. You can also go through the notes one by one in document order with the left and right arrows on the controls at the top right.
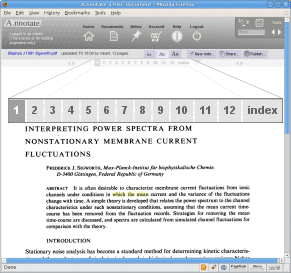
For multi-page documents, there is a row of buttons at the top
to select pages or go to an index view showing only the notes.
|
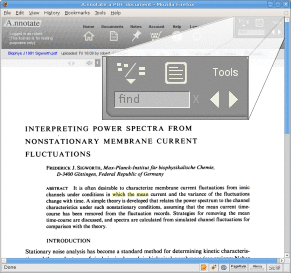
Other options are in the top-right, including setting the note
display style, editing document properties and searching within the
text.
|
The top left button on the controller brings up the note display style menu. This changes the way notes are displayed between: no notes, movable boxes over the text (the default), in the right hand margin, and as footnotes.


